Friday, August 16, 2013

Creamy Cashew Dip a.k.a. Ninja Awesomesauce (with bonus recipe - homemade vegan mayo!)

Hello, dearest ninja readers!  I'm here today with two lovely recipes just for you.  The first is a creamy dip/spread/sauce made primarily of raw cashews with some other yummy stuff thrown in there.  It's easy and amazing and I have thus dubbed it "Awesomesauce."  It's thick and creamy enough to dip raw veggies in (carrots are my fave) or spread on a sandwich or burger.  If you want it thinner to pour over steamed broccoli or something, just add more water.  Easy!

The "bonus" recipe is my own recipe for homemade vegan mayo.  Before I figured out this recipe, I was a great lover of Vegenaise, but at over 4 bucks a jar the stuff is expensive as all heck....plus the only place I've found it around here is Whole Foods and I hate making a special trip there just for Vegenaise.  I swear, this stuff tastes just as good and it's made with easy-to-find ingredients and costs a fraction of what store-bought vegan mayo will run you.  I like it on veggie burgers or on tomato sandwiches with tomatoes fresh from my garden.

On to the recipes!

Creamy Cashew Dip a.k.a. Awesomesauce

Served up with loads of fresh veggies - yum!


Ingredients:

1 cup raw cashews
1/4 cup water
1 clove garlic
1/4 of a small onion
1 Tablespoon soy sauce
1 Tablespoon nutritional yeast
1/2 teaspoon hot pepper sauce 

Throw all that stuff in a blender and blend until smooth and creamy.  If it's not creamy enough, just add water, 1 tablespoon at a time, until you reach the right consistency.  Eat.  That's it!  This stuff never lasts long in my house.

Tips and Tricks:

1. Make sure you use RAW cashews.  Roasted ones won't work.

2. The hot pepper sauce is optional.  It honestly doesn't make the dip spicy at all (just a little underlying zing I guess) so if you want to omit it, you can with no harm done.  On the other hand, if you want this stuff super-spicy, try doubling the amount, or adding more in a little at a time until you reach your desired level of hotness.


Bonus recipe: Ninja Vegan Mayo

Ingredients:

12oz box of silken tofu (the shelf-stable kind)
1/2 cup canola or other light oil
1 Tablespoon apple cider vinegar
1/2 teaspoon agave (or use regular sugar)
1/2 teaspoon lemon juice
1/2 teaspoon salt
1/4 teaspoon mustard powder
1/4 teaspoon arrowroot
pinch onion powder
pinch garlic powder
pinch white pepper 

Blend it all up until well combined.  Spread on everything.  Eat.

Tips and Tricks:

1. If all you have is water-packed tofu, this will probably still work, but water packed tofu tends to come in larger packages, so don't quite use all of it.

2. If you don't have arrowroot, you can leave it out; your mayo will just have a slightly thinner consistency.

3. If you don't have white pepper, just use black; it'll be fine.

4. This keeps in the fridge in a lidded container for quite a while, if you open the container and there is liquid sitting on top, just stir it back in again.


Well ninjas, that is all for today.  Two quick and easy recipes to spread all over your veggies and burgers as we close out the summer.  I'll have more recipes coming soon, as well as pics of the newest addition to the Fur Ninja family - Star the pit bull!  (and yes, that is the name she came with).  We rescued her 3 weeks ago and I couldn't have asked for a better best friend.  She's a little camera-shy, but pics to come soon.  Until then, happy eating!

Love,

The Fur Ninja <3>

Wednesday, July 24, 2013

"That Mexican Thing" a.k.a. Southwest Veggie and Okra Stew with bonus rice recipe

So wow....I haven't posted in a bit over 2 months.  I kind of feel bad.  Did any of you miss me?  Or miss my food at least?

Well, here I am, back again with a recipe that I've made a couple of times now and it always turns out pretty delicious.  Plus, it's insanely easy.  It's based on a recipe that I found hand-written in messy scrawl on a scrap of paper and tucked inside one of my cookbooks.  I suspect that my ex boyfriend/good friend Andy found it on the internet and wrote it down because I vaguely remember him making something yummy with okra in it for me once.  Well, I have no idea where he got it or why it was in one of my cookbooks, but I found it, tweaked it, and here it is for your enjoyment.

It's a called "stew" because I've been serving it with rice, but it would also be good stuffed into tacos or a burrito or just dipped into with some crunchy tortilla chips, so it's really versatile; hence around our house we've just been referring to it as "that Mexican thing."  I've also included  a recipe for cheater "Spanish rice" when, dammit, you're just too lazy to put any effort into it.  Serve them both together for a quick, easy, and veggie-ful meal.  The rice recipe is below the main recipe.

"That Mexican Thing" or Southwest Veggie and Okra Stew


Ingredients:

2 Tablespoons olive oil
2 cloves garlic, minced
1 onion, diced
1 jalapeno, seeded and minced
1 red bell pepper, diced
2 teaspoons cumin
1 teaspoon paprika
1 teaspoon chili powder
dash of cinnamon
1 1/2 teaspoons salt
1 cup corn kernels
4 cups sliced okra
16 ounce can vegetarian refried beans
1/2 can water
1 Tablespoon cornstarch
1/2 cup nutritional yeast
1/2 cup chopped cilantro

garnishes:
chopped avocado, tomato, onion, cilantro

Heat the olive oil in a large pot over medium heat.  Add the minced garlic, onion, jalapeno, and bell pepper.  Cook for 4 minutes until the vegetables begin to soften.  Add the spices and salt and cook for 30 seconds.  Add the corn, okra, and refried beans.  Fill the can up again halfway with water, add the cornstarch, and mix with a fork until the lumps are dissolved.  Add the water and cornstarch mixture into the pot.  Bring to a boil.  Boil gently for 3-4 minutes until the beans form a thick sauce.  Turn off the heat and stir in the nutritional yeast and cilantro.
Garnish individual servings with more chopped cilantro, avocado, tomato, and onion.  Enjoy!

Tips and Tricks:

1. Use frozen corn kernels and frozen pre-sliced okra to save time.

2. Make sure to check your refried beans to make sure they are vegetarian - some are made with lard; ew!

3. Serve with Cheater Spanish Rice (recipe below)


Cheater Spanish Rice

Ingredients:

2 cups hot cooked rice (white or brown)***
1 Tablespoon non-dairy butter (optional)
1/2 cup of your favorite jarred salsa

Mix together.  That's it!

*** Use quinoa or couscous or any other kind of grain to change things up a bit!

That's all for now; hope you enjoy :)  Recipes soon for my homemade vegan mayo and creamy cashew dip, a.k.a. "Awesome Sauce."

Also, I'm adopting my very own doggy from the animal shelter on Friday, so pics of him/her soon to come as well!  Until then....much love and happy vegan tummies!

Love,

The Fur Ninja <3

Wednesday, May 15, 2013

Fur Ninja's Ridiculously Radical Red Velvet Cake

Holy crap.....try this cake.  No seriously.  Try it.  Mike said it was the BEST red velvet cake he's ever had (presumably that includes non-vegan ones baked by grandma) so I think that's a pretty strong endorsement.  And it wasn't just Mike scarfing it down either.  The Bills (we have two friends named Bill) each scarfed down a couple of pieces.  AND Mike's kids all loved it, which is good, because the reason I made it was it was his daughter Monnet's 16th birthday.  It's delicious and ridiculously moist and flavorful and everything a red velvet cake should be.  If you never make anything else that I post on here, make this cake.  MAKE IT!  MAKE IT NOOOOOW!

Ahem....

Here's the recipe:

Fur Ninja's Ridiculously Radical Red Velvet Cake

I'm drooling right now
Ingredients:

2 1/2 cups flour
1 1/2 cups sugar
1 teaspoon baking soda
1 teaspoon salt
1 teaspoon cocoa powder
1 cup non-dairy milk (I used almond)
1 teaspoon white vinegar
1 1/2 cups canola or other light vegetable oil
1/2 cup unsweetened applesauce
2 Tablespoons red food coloring
1 teaspoon vanilla extract

Ninja Cream Cheese Frosting (recipe below)

Preheat oven to 350 degrees F.  Grease and flour a 13x9" pan.

In a medium bowl, sift together the flour, sugar, baking soda, salt, and cocoa.  Combine the non-dairy milk and vinegar in a small bowl or measuring cup and allow to sit for a few minutes to curdle.  In a large bowl, combine the non-dairy milk mixture, canola oil, applesauce, red food coloring, and vanilla and mix well.  Add dry ingredients into wet ingredients and mix until a smooth batter is formed.

Pour batter into prepared pan and bake for 20-25 minutes or until a toothpick in the center comes out clean.  Allow the cake to cool completely before frosting.

Ninja Cream Cheese Frosting

Ingredients:

1 - 8 ounce package plain Tofutti or other cream cheese substitute
2 1/2 cups confectioners sugar
1/2 cup non-dairy butter, softened
1/2 teaspoon vanilla extract

Whip tofutti, non-dairy butter, and vanilla with an electric mixer until smooth.  Add the confectioners sugar, 1/2 cup at a time, beating after each addition.  When all of the sugar is added, beat at high speed for 5 minutes until icing is fluffy.  Ice the top of the cake once cooled.

Tips and Tricks:

1. I made this as a sheet cake because it was A. easy and B. I can't find my round cake pans.  You could most definitely make this into a layer cake or cupcakes, although you may have to adjust baking times.  I'll try to make these in the future and edit the recipe to include baking times for both.  Or feel free to comment and let me know how long you baked them if you tried this!

2. I love Tofutti cream cheese.  LOVE IT.  Smeared on a toasted "everything" bagel and topped with thin sliced tomato, salt, and pepper....drooooool.....it's simply the best there is.  However, there are other vegan-friendly cream cheese subs out there, so feel free to use whatever floats your ninja boat.  If you do use Tofutti, try to find the stuff in the yellow package rather than the white, because it has no trans fats.

3. This requires a LOT of red food coloring.  Don't get the little package with all 4 colors in it....you need the big single bottle of red.  And you'll use most of the bottle.  Just a warning so you don't find yourself short of red coloring in the middle of the recipe.


Well, there it is.  An amazingly awesome cake recipe just for you.  It's horribly fattening, but that's just a reason to share with friends.  I hope you enjoyed it!  I'll be returning soon with my now-perfected homemade vegan mayo recipe, veggie-full mac and cheeze, and curried vegetable soup.  Until next time!

Love,

The Fur Ninja <3

Thursday, April 11, 2013

How to Cook and Eat a Fresh Artichoke - Bonus Dipping Sauce Recipe!

Hey all!  I realize that I haven't been posting consistently as of late, but I've been a busy little bee here and haven't had the time.  I got a new job, and we are getting ready for springtime here at the Fur Ninja house - lots of spring cleaning and planting the gardens.  We planted cucumbers, okra, golden beets, peas, tomatoes, a rainbow of different colored bell peppers, a mix of leaf lettuces, and onions....also moonflowers and daisies, and we might put in strawberries and a blueberry bush as well.  So I've been busybusybusy and haven't had a moment to devote to posting new recipes for you.  But, I'm back and will have some lovely new springtime eats for all of you!

So to start with the welcome-to-spring recipes, here's a great one for fresh-cooked artichokes and a yummy dipping sauce to go with them.  Before meeting Mike, I had never had a fresh, whole artichoke before, and he taught me how easy they are to make and fun to eat!

First, we're going to talk about how to cook an artichoke.  It's easy.  First you need an artichoke (or two):

Cut off most of the length of the stem and pull off any dirty or malformed bottom leaves.  Rinse the artichokes and put them in a large pot.  Add water to cover.  Now place the pot, uncovered, over high heat and bring to a boil.  Lower the heat to a simmer, and simmer the artichokes for 30 minutes.  When the time is up, check for done-ness by pulling at the bottom leaves.  They should come off easily.  If not, simmer them for a few more minutes.
That's it!  Now you're ready to eat.  Here's how to eat an artichoke:

1. Pull off a leaf from the bottom.

2. Dip in sauce (optional).  Mike likes mayo, but some Vegenaise would probably also be amazing since we're vegans around here.  Also good is hummus, goddess dressing, and my own recipe for chili chickpea dip (recipe below).

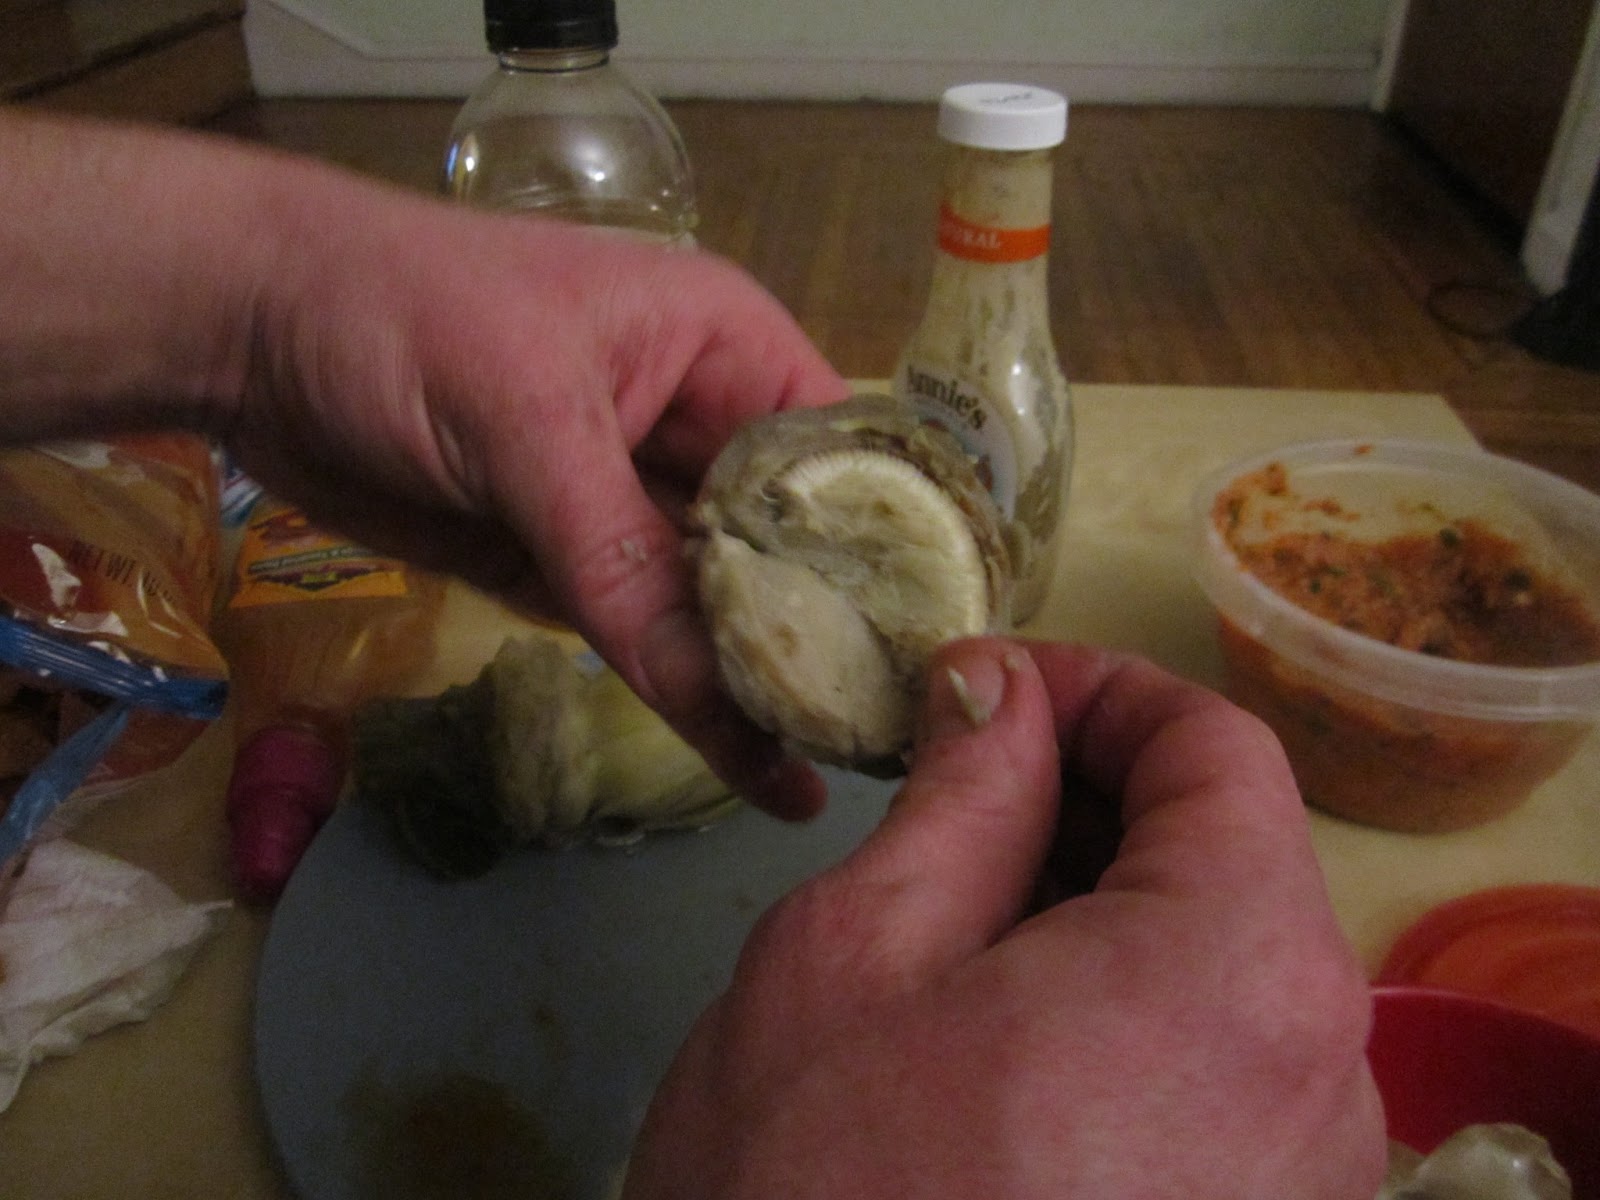
3. Scrape off the sauce and soft outer layers of the leaf with your teeth, as Mike is demonstrating here.


4. Discard the rest of the leaf.


5. Repeat with a new leaf until all the leaves are gone.
With yummy goddess dressing and chili chickpea dip in the background


6. Once all the leaves are gone, you'll be left with the artichoke heart that is covered by this weird, fuzzy stuff called the "choke."  Don't eat the choke.  Remove it with your fingers to uncover the heart below.
The choke covering the yummy heart

Mike pulling off the fuzzy choke

Choke gone and the heart is ready to eat!


7. Cut or break the heart into bite-sized pieces, dip and eat!
Delish!

8.  Yum!  Have another!

Artichokes are so easy to make and such fun finger-food that I'm sad I only just discovered how awesome they are.  We'll be eating a lot of these outside this summer!

Now, as promised, here is the super-easy and tasty recipe for my Chili Chickpea Dip. This dip is great not just with artichokes, but also with other fresh veggies, tortilla chips, or pita bread.  You can add more or less hot sauce to adjust for how much spice you want.

Chili Chickpea Dip

Ingredients:
1-15 ounce can of chickpeas, drained and rinsed
1-14.5 ounce can diced tomatoes (preferably fire roasted)
1/2 an onion, chopped coarsely 
3 cloves garlic, chopped
1 1/2 teaspoons paprika
1 1/2 teaspoons cumin
1/2 teaspoon sugar
1/2 teaspoon oregano
1 teaspoon salt (or to taste)
1 Tablespoon lime juice
2 teaspoons hot sauce
1/2 cup lightly packed cilantro

Throw everything in a blender or food processor and pulse until everything is well combined.  You don't want to totally puree the mixture; it should be a little chunky but everything should be evenly mixed.  Chill until ready to serve.

That's all for now, but I'll be back soon with a recipe for kid-approved peanut butter and jelly muffins, and I'm working on a mac and cheese with kale and lemon raspberry scone recipes as well.  See you soon!

Love,

The Fur Ninja <3

Saturday, March 16, 2013

Braised Tempeh with Fennel and Spring Vegetables

Well, I know it's been a minute, but I'm back again with some new recipes just perfect for this time of year.  On days like today, when it is sleeting outside (well, it is here in Philadelphia anyway), it might be hard to believe that spring is right around the corner, but indeed it is.  My next few recipe posts will highlight fresh and seasonal spring vegetables that will be making their way into farmer's markets and supermarkets alike very, very soon.  Cooking with fresh, local veggies is always the best way to go, so add some of these recipes to your spring cooking arsenal.

Don't be intimidated when you scroll down and see the ingredients list.  Once you have the veggies chopped, this recipe comes together quite quickly and easily, and it makes enough to have leftovers for quite a while.  This recipe is a delicious combination of marinated and braised tempeh with crisp veggies like fennel, yellow bell pepper, and green beans.  Everything is sauteed gently and then braised in the herbed white wine marinade from the tempeh with plum tomatoes and even more fresh herbs.  Serve the whole thing over rice, couscous, or quinoa for a colorful and flavorful springtime feast.

Braised Tempeh with Fennel and Spring Vegetables
serves 6-8


Ingredients:

8 ounce package tempeh

(Marinade)
1/4 cup white wine
1/4 cup vegetable broth
2 cloves garlic, minced
2 Tablespoons olive oil
2 Tablespoons soy sauce 
1 Tablespoon packed brown sugar
1/2 teaspoon marjoram
1/4 teaspoon thyme, crumbled a bit in your fingers
 several grinds fresh black pepper 

2 Tablespoons olive oil
3 cloves garlic, minced
1 onion, sliced into thin half moons
1 fennel bulb, sliced 1/4" thick
1 yellow bell pepper, seeded and diced 
2 cups halved green beans
1 - 28 ounce can whole tomatoes with juice
1 Tablespoon cornstarch
2 sprigs fresh rosemary
2 sprigs fresh thyme
1 - 15 ounce can white beans, drained and rinsed
zest from 1 orange
2 teaspoons salt
several grinds fresh black pepper
2/3 cup chopped fresh parsley  


Cut the tempeh into cubes about 3/4 of an inch.  Mix together all of the marinade ingredients in a shallow dish.  Add the tempeh and marinate at least 30 minutes (but the longer the better), tossing halfway through marinating to ensure that all sides are covered in the marinade.
Heat the 2 Tablespoons olive oil in a large soup pot over medium-low heat.  Add the 3 cloves minced garlic and sliced onion.  Cook for 12 minutes until onion is carmelized.  Add the tempeh along with the marinade to the pot and raise the heat to medium.  Simmer for 5 minutes.  Add the fennel, bell pepper, and green beans and cook for another 3 minutes.
Remove the tomatoes from the can and slice widthwise into approximately 1/2" sections.  Add the tomatoes to the pot.  Add the cornstarch to whatever juice is left in the can from the tomatoes and whisk with a fork until most of the lumps have dissolved.  Add the juice to the pot with the sprigs of fresh rosemary and thyme.
Now, take a moment to look at how pretty this all is:


Make sure everything is mixed together and that the sprigs of fresh herbs are incorporated into the mixture.  Cover the pot and allow everything to simmer together for 20 minutes.
Now uncover the pot, remove the rosemary and thyme sprigs, and give everything a stir.  Add the drained and rinsed beans, orange zest, salt, pepper, and parsley.  Stir again and turn off the heat.  Allow everything to sit for 5 minutes to incorporate the flavors.  Serve and enjoy!

I hope you all decide to try this recipe as the weather turns warmer.  It is beyond delicious and perfect for dinner after a trip to the farmer's market.  Mike and I both loved it and I'll definitely be making this again!

Up soon, more springtime recipes, including how to cook and eat fresh, whole artichokes (if you've never had one you are in for a treat and they're easy to make and fun to eat!) with yummy sweet and spicy dipping sauce.  As always, feedback is appreciated, and see you all soon!

Love,

The Fur Ninja <3
        

Saturday, February 16, 2013

Easy Spiced Roasted Carrots

Happy Saturday, ninjas!  I know I haven't been blogging much as of late, but things have been very stressful in my life for some personal reasons.  Even my usual "heal what ills you with food" approach to all things negative hasn't been very successful lately.  But yet, this ninja soldiers on.   I came up with this recipe a few nights ago when I needed a yummy side dish to fill out a Middle Eastern meal of falafel (made from a box mix) in whole wheat pitas topped with fresh veggies and the "Dill Tahini Sauce" from Veganomicon (this cookbook is a must-have for any vegan.  If you do not yet own it, please purchase it HERE).  The carrots were a perfect, slightly-spicy accompaniment to simple yet delicious Middle Eastern fare.  This recipe makes two big servings, but if you're serving a crowd, feel free to double, triple...whatever.  No matter how much or how little you make, this recipe is so easy that it will turn out great every time.

Easy Spiced Roasted Carrots
Makes two big servings


Ingredients:
2 cups carrots, peeled and sliced 1/2" thick
1 small onion, sliced into thin half moons
1/2" square fresh ginger, peeled and minced
1 Tablespoon olive oil
2 teaspoons packed brown sugar
1/4 teaspoon coriander
pinch cayenne
1/2 teaspoon salt
juice of 1/2 a lemon (about 1 1/2 Tablespoons)
1/4 cup chopped fresh parsley   

Pre-heat your oven to 400 degrees F.
Place the carrots, onion, and ginger in an oven-safe baking dish.  Drizzle with the olive oil and mix well to coat.  Add the brown sugar, coriander, cayenne and salt.  Toss everything together until evenly coated with oil and spices. Roast in the pre-heated oven for 35 minutes, checking once after about 15 minutes to stir everything around to ensure even cooking.  The carrots should be soft, but not mushy.
Remove the dish from the oven.  Add lemon juice and parsley.  The lemon juice will sizzle a bit in the hot pan and the parsley will wilt slightly.  Serve warm or room temperature.

Tips and Tricks:

1. The easiest way to peel fresh ginger is to scrape at the skin with the side of a spoon while running it under cool water.

2. Cold leftovers make a delicious filling for a pita!


Well, that's it for the food stuff today, but I do have one more thing to mention that is not specifically vegan-related.  As an owner of a small internet business myself, I'm always up for supporting someone else who is trying to get their own product off the ground.  I was recently contacted by the makers of this weird piece of clothing called Hoorag and asked if I would write a review on my blog if they sent me one.  So send me one they did, and even though it really has nothing to do with veganism, I thought some other people out there who were outdoors-y folks or runners might be interested.  As a runner, and as someone who occasionally has a head full of bulky dreadlock extensions, I personally love it.  It keeps my face warm like a ninja mask when I'm running in the cold, and it's pretty awesome at keeping unruly dreads contained while I'm trying to complete a workout or clean my house or whathaveyou.  So if you're a hiker, runner, or just have some big ol' hair, go check them out.  They have lots of cool prints to choose from (mine has sunflowers) and they make warm ones for winter and even ones for doggies.  Here's some pics of me in mine before going out for a frigid run in the cold:

Ready to run without feeling like I'm being stabbed in the lungs by cold winter air.  Yay!

Well, after that little endorsement, I must bid you all adieu.  More recipes soon.  Much love....

Love,

The Fur Ninja <3


Tuesday, January 29, 2013

A Not-Really Recipe: Souped Up Tomato Soup

Hi there, fellow ninjas!  I'm working on some new recipes, but in the mean time, here's another "not-really" recipe for when you need a quick and easy meal.  This is only my second not-really recipe post, so for those of you who don't know, "not-really recipes" are meals using some convenience ingredients, but with a homemade twist.  These are the kinds of meals I make when I'm pressed for time, and they're proof that quick and easy can be healthy and delicious as well!

So here's a recipe for some warm and delicious tomato soup that packs a far bigger nutritional punch than regular, boring canned soup.  In addition to the healthy benefits of tomatoes, this soup also has protein from beans and whole wheat orzo that is both filling and good for you.  The flavor gets kicked up with some garlic, fire roasted tomatoes and fresh basil for a soup far more satisfying than anything right out of the can.  And the best part?  It's ready in 15 minutes.  This soup can be a meal on it's own, or pair it with vegan grilled cheese (find my recipe for Ninja Cheesy Spread HERE) or a green salad.

Souped Up Tomato Soup


Ingredients:

2.5 servings (1 can) ready-to-eat canned tomato soup, or 1 can condensed tomato soup with water added according to package instructions
3 cloves garlic, minced
1 Tablespoon olive oil
2 cups vegetable broth
3/4 cup whole wheat orzo or other small pasta
1-14.5 ounce can of beans (any kind; I used black beans), drained and rinsed
14 ounce can diced tomatoes (fire roasted if possible)
1/4 cup chopped fresh basil (optional)

Heat the olive oil in a large soup pot over medium heat.  Add the garlic and cook for 2-3 minutes until fragrant.  Add the tomato soup (with water if using condensed), vegetable broth, orzo, and diced tomatoes.  Raise heat and bring to a boil.  Boil uncovered 8 minutes.  Lower heat back to medium and stir in the beans.  Heat for 3 minutes or until heated through.  Remove from heat and stir in the fresh basil.  Top each bowl with additional fresh basil if desired.

That's all for now!  Hope you enjoy this soup while this cold weather continues.  More from-scratch recipes will be up soon!

Love,

The Fur Ninja <3

Thursday, January 24, 2013

Sun Dried Tomato and Basil Focaccia

Hello, all!  I realize that it's been quite some time since my last post, but I was having some computer problems...."problems" meaning I dropped my laptop down some stairs and cracked the screen.  I was without my own computer for a bit until my lovely man got a new screen and installed it for me.  But hey, I'm back, and here's a yummy and easy focaccia recipe! 

This bread is lovely orange color from the sun dried tomatoes and bursting with flavor from lots of garlic, basil, and rosemary.  It's easy to make in either the bread machine or by hand; I've included instructions for both methods.  Have this bread the next time you make an Italian meal, or coupled with a soup and green salad.

Sun Dried Tomato and Basil Focaccia


Ingredients:

2 teaspoons yeast
1 cup warm water
2 teaspoons sugar
4 cups flour
3 Tablespoons olive oil
3 cloves garlic, minced
1/4 cup sun dried tomatoes, chopped finely
1/4 cup fresh basil leaves, chopped finely
1 Tablespoon salt

[for the top of the bread]
2 teaspoons olive oil
1 1/2 teaspoons rosemary
1 teaspoon coarse salt

To make in a bread machine:

Combine the yeast, water, sugar, flour, 3 Tablespoons olive oil, garlic, tomatoes, basil, and 1 Tablespoon salt in the bread machine in the order suggested by the manufacturer.  Set the machine to the "dough" setting and turn on.  Check on the dough about 5 minutes into the cycle to make sure that it is coming together into a smooth ball.  If it is too dry, add water 1 Tablespoon at a time, or if it is too runny, add flour 1 Tablespoon at a time, until a smooth ball of dough starts to form.  Allow the cycle to complete.
When the dough cycle has finished, turn the dough out onto a floured surface and knead a few times.  Place on a baking sheet that is lightly sprayed with cooking spray and form into a round shape about 1-2" thick.  Cover with a clean towel and allow to rise again in a warm place for 30 minutes.  Pre-heat your oven to 400 degrees F.
Remove the towel and make dimples all over the top of the dough with your fingertips.  Brush the top of the dough with the 2 teaspoons olive oil, and sprinkle with the rosemary and 1 teaspoon coarse salt.  Bake in pre-heated oven for 15-20 minutes.  Bread is done when the bottom of is slightly golden and the bread makes a hollow sound when tapped.  Allow to cool 5 minutes before slicing.


To make by hand:

Combine the yeast, water, and sugar in a large bowl and allow to sit for 3 minutes.  The top of the liquid should have a creamy foam.  Add the garlic, tomatoes, basil, salt, and olive oil and mix.  Add the flour 1/2 cup at a time, mixing with a spoon after each addition, and using your hands when the mixture becomes too thick for the spoon.  Turn the dough out onto a floured surface, and knead the dough for 10 minutes until you have a ball of dough that is smooth and elastic.  If your dough is too dry, add water 1 Tablespoon at a time, if your dough is too runny, add flour 1 Tablespoon at a time until you reach the correct consistency.  Form your dough into a ball and place in a large bowl.  Pour a small amount of olive oil on the top of the dough, and turn the ball to coat the entire outside with oil.  Put a clean towel over the bowl and allow to rise in a warm place for 45 minutes.
After 45 minutes, the dough should be about doubled in size.  Turn the dough out onto a floured surface again and knead a few times.  Form into a round shape about 1-2" thick and place on a baking sheet that has been lightly sprayed with cooking spray.  Place the towel over the top of the dough again and allow to rise for another 30 minutes. 
Pre-heat your oven to 400 degrees F.
Remove the towel and make dimples all over the top of the dough with your fingertips.  Brush the top of the dough with the 2 teaspoons olive oil, and sprinkle with the rosemary and 1 teaspoon coarse salt.  Bake in pre-heated oven for 15-20 minutes.  Bread is done when the bottom of is slightly golden and the bread makes a hollow sound when tapped.  Allow to cool 5 minutes before slicing.


Tips and Tricks:

1. Make sure you watch your dough.  Altitude, humidity in the air, temperature, and other factors can affect how dry or wet your bread dough is.  The amount of flour and water in bread recipes is a basic guideline, but you may need to add more water or more flour depending on your specific situation.  The dough should form a smooth ball that is not too sticky.  Add flour or water as directed in order to achieve the correct consistency.

2. Kalamata olives would also be a delicious addition to this bread.  I chose not to include them, because Mike may or may not be allergic to them and I didn't want to take the risk.  If you would like the olives in your bread, add 1/4 cup pitted and chopped olives when you add the tomatoes and basil.  Alternately, you can add them on top of your bread with the salt and rosemary.


Well, that's all for today.  I'll have lots more delicious recipes coming your way soon!

Love,

The Fur Ninja <3

Wednesday, January 9, 2013

Chocolate Chip and Toasted Pumpkin Seed Waffles

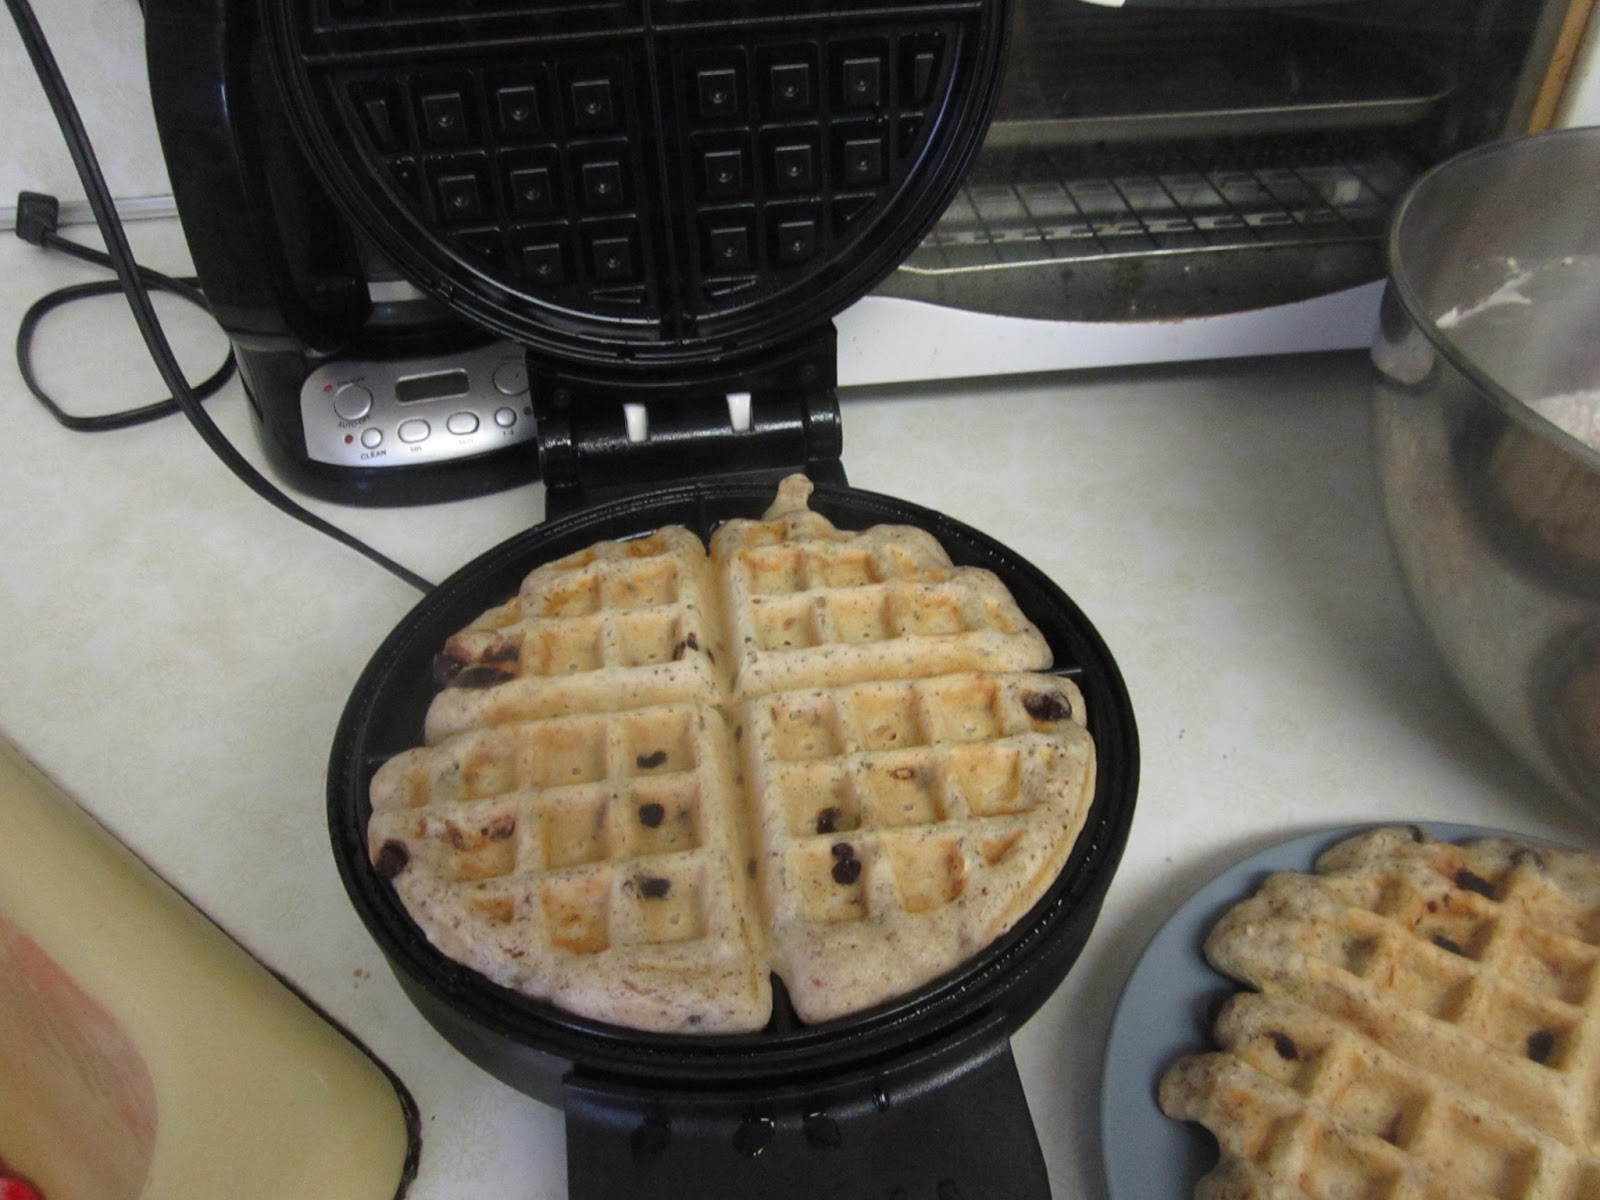
Happy new year!  I realize that I haven't posted since before Christmas, but the holidays were crazy and then directly afterwards I came down with the flu.....again.  I guess they weren't kidding when they said on the news that this year was a terrible year for the flu.  However, I'm feeling better now, so I'm back!  Well, yesterday some tragedy hit - the drive axle on my car broke while I was picking Mike up from work yesterday.  So here we are sitting around today waiting for the garage to call about my car.  Mike is off work today since he has no way of getting there, so I thought I may as well turn a negative into a positive and use this little impromptu "vacation" day as an excuse to make a nice brunch for the two of us.  I decided to make use of one of my Christmas presents - a new belgian waffle maker - to make some delicious lazy-day breakfast treats.  Here's what I came up with - yummy, crispy, fluffy waffles with dark chocolate chips and toasted pumpkin seeds.

These waffles may be a bit decadent, what with the chocolate and all, but you can feel free to leave the chocolate out if you like.  You can also make these with whole wheat pastry flour or a combination of whole wheat and white flours to make them healthier.  I used white flour because it's what I had on hand, although I think they would be delicious made with whole-grain flour.  As they are, these still pack a nutritional punch with the pumpkin seeds which are high in protein, vitamin E, magnesium, B vitamins and healthy monounsaturated fats.  The flax seeds also add omega-3s and fiber and you get some antioxidants from the chocolate.  Plus chocolate releases "happy feelings" chemicals in your brain.  There's really not even all that much chocolate in the recipe - just enough to get a little "fix" - so I wouldn't worry too much about it.  These are a great lazy-day treat for you and someone you love.

Chocolate Chip and Toasted Pumpkin Seed Waffles


Ingredients:

1/3 cup shelled pumpkin seeds
2 Tablespoons flax seeds
1/2 cup water
2 cups all purpose flour
4 teaspoons baking powder
1/4 teaspoon salt
1 3/4 cups non-dairy milk
1/2 cup vegetable oil
1 Tablespoon pure maple syrup
1/2 teaspoon vanilla extract
1/3 cup vegan dark chocolate chips

Pre-heat your waffle maker according to manufacturer's instructions.
Heat a small skillet over medium-low heat.  Add the pumpkin seeds to the dry skillet and toast the seeds until slightly golden and fragrant, 3-5 minutes.  Stir the seeds constantly and be careful not to burn.  Remove from heat and set aside.
Combine the flax seeds and water in a blender or food processor.  Blend until creamy.  Place the flax seed mixture in a small bowl and add the non-dairy milk, oil, maple syrup, and vanilla.  In a separate, large bowl, combine the flour, baking powder, and salt.  Add wet ingredients into dry ingredients and mix until just combined.  Fold in the toasted pumpkin seeds and chocolate chips.
Cook the batter in your pre-heated waffle maker according to manufacturer's instructions.  Enjoy!

Tips and Tricks:

1. A "bullet" style mini blender works great for blending the flax seeds and water.  Alternately, you can purchase flax seed meal rather than whole seeds, and simply mix the meal with the water with a fork or whisk until creamy.

2. Leftover waffles freeze well for a quick breakfast in the days ahead.  Simply place a sheet of foil or waxed paper between each waffle, and wrap the whole stack in more foil or plastic wrap and place in the freezer.  Re-heat in a toaster oven and you have a nearly-instant yummy breakfast that's far more tasty and delicious than anything from the supermarket freezer section.


That's all for now, ninjas!  More recipes forthcoming!  I'll leave you now with a few more pics of our romantic little candlelight brunch from today :)

My awesome belgian waffle maker!

Waffles are best when served with lots of real maple syrup and non-dairy butter!

Mike enjoying some waffle-y goodness.

Yum!
Hope everyone else is having a good start to their new year.  See you next time!

Love,

The Fur Ninja <3

Sunday, December 23, 2012

Vegan Holiday: Cornbread, Squash and Brussels Sprouts Stuffing with Tempeh Bacon

It's the countdown to a very ninja Christmas!  Here at the Fur Ninja house, we had a special early Christmas with Mike's kids since we won't see them on the 25th.  We opened presents, baked and decorated vegan Christmas cookies (and spilled lots of colored sugar on the floor!), went to see the Love Park Christmas Village, and even got a special phone call from Santa Claus!  Tomorrow is Christmas Eve and Mike and I will be dropping the kids off at their mom's, going to see my grandmother, attending a live nativity Christmas Eve service at the church I've been attending, and then lounging on the couch drinking spiked vegan nog and chocolate martinis while watching "Love Actually" and "Gremlins."  We've been so busy for the past few days and working on so very little sleep, that we may not get off that couch for quite a while!

But in case you've got more time and energy that I've had lately, or in case you need another dish to round out your Christmas dinner, here's a recipe for a very non-traditional stuffing made with lots of delicious veggies, yummy cornbread, and some smoky and sweet tempeh bacon.  Lots of fresh herbs round out the flavor and walnuts add a wonderful crunch.  This stuffing is pretty and delicious and would make a great addition to any dinner or family gathering.

Cornbread, Squash, and Brussels Sprouts Stuffing with Tempeh Bacon


Ingredients:

A double recipe Ninja Skillet Cornbread cut into 1" cubes OR enough vegan cornbread cubed to make 12 cups
One recipe Smoky Tempeh Bacon cut into bite-sized pieces
1 - 3lb butternut squash
Olive oil for roasting the squash
4 Tablespoons non-dairy butter
1 large leek, cleaned and sliced 
2 cups diced celery
1 Tablespoon minced fresh sage
1 Tablespoon minced fresh thyme
1 teaspoon salt
freshly ground black pepper to taste
2 cups vegetable broth
1 cup brussels sprouts, halved
1/4 cup chopped fresh parsley
1 cup walnut halves

Pre-heat your oven to 400 degrees F.  Cut the butternut squash in half, scoop out the seeds and stringy bits, and rub the squash with oil.  Place on a lightly greased baking sheet, cut side down and roast for one hour.  The squash is done when easily pierced with a fork.  Remove from the oven, allow to cool, and remove the skin from the flesh but do not turn off the oven.  Dice the flesh into 1" pieces and place in a large bowl with the cubed cornbread.
Meanwhile, melt the non-dairy butter in a large skillet over medium heat.  Add the sliced leeks, celery, sage, thyme, salt, and pepper and saute for 5 minutes until the vegetables soften.  Add the vegetable broth and simmer for another 3 minutes.  Remove from the heat and allow to cool slightly.  Add to the bowl with the cornbread and squash.
Heat a saucepan of water to boiling and add the brussels sprouts.  Boil for 4 minutes.  Drain and add to the bowl with cornbread and other ingredients along with the chopped parsley and walnuts.  Using salad tongs or two large spoons, gently toss everything in the bowl until the ingredients are evenly mixed.
Lightly grease a 9x13 inch baking pan and add the stuffing mixture to the pan.  Cover tightly with aluminum foil and bake for 30 minutes.  Remove the foil and bake for another 20 minutes or until lightly browned on top.

Tips and Tricks:

1. This recipe tastes best if your cornbread is slightly stale.  The best way to accomplish this is to cut the bread into cubes, place the cubes in a bowl, and just let them sit for a day either on the counter or in the fridge.  If you are using fresh cornbread, or if you want a crunchier texture, you can toast the cubes in a 400 degree oven for about 15 minutes or until lightly browned.

2. Cleaning leeks - leeks tend to have a lot of grit, so make sure you clean them well before using them in this or any other recipe.  The easiest way to do this is to slice the leeks and add the slices to a large bowl of cold water.  Swish the leeks around a bit, then let them sit in the water for about 5 minutes.  The grit will sink to the bottom of the bowl.  Remove the leeks with a slotted spoon without disturbing the water too much and you're ready to go!

3. If you're making a big dinner and need to save time in the kitchen, you can assemble the whole recipe a day or two ahead of time into the baking pan, but don't bake.  Cover with foil and place in the fridge until you are ready to pop it in the oven.

So I hope this latest recipe finds all of you well and ready to spend some quality holiday time with loved ones.  I will have one more recipe to post before Christmas (chocolate dipped sugar cookies) and then I will be taking some well-deserved down time on the 25th.  Mike and I are going to spend a quiet Christmas at home with the kitties and just appreciate how thankful we are to have so much love and so many blessings in our lives.  I hope all of you are looking forward to a holiday filled with warmth and love as well.  Until next time!

Love,

The Fur Ninja <3

Saturday, December 22, 2012

Smoky Tempeh Bacon

Happy Saturday! Well, the world didn't end yesterday, so what better way to celebrate than to make a big ol' breakfast with some yummy vegan bacon? Now, I haven't tasted actual bacon on over 15 years, but Mike told me that the taste of this was "bacon-y" although the texture isn't fooling anyone. The sweet smoky flavor is far superior to store-bought veggie bacon though (and most of the veggie bacons I've seen aren't vegan anyway) so make some of this with some vegan pancakes and roasted potatoes for a big hot breakfast full of yum. What a great way to begin the day (and the next Mayan calendar cycle for that matter!)
The longer you can possibly marinate the tempeh, the better, so plan ahead. I'd recommend marinating it overnight, but you really need to let it sit in the marinade for at least an hour. The longer the tempeh soaks, the more delicious the flavor will be. This is great served as-is with breakfast, layered onto some sandwich bread with lettuce and tomato, or used in a recipe - I actually made my last batch of this to add to a cornbread stuffing recipe (that's getting posted next!) so get creative, and use this wherever you'd like some smoky, bacon-y flavor.

Tempeh Bacon
Sizzlin' in the pan....yum!

Ingredients:
 8 ounces tempeh
1/2 cup soy sauce
3 cloves garlic, minced
1/4 cup pure maple syrup
1 Tablespoon apple cider vinegar
1 Tablespoon tomato paste
2 teaspoons liquid smoke
a few grinds black pepper
4 Tablespoons peanut or canola oil for frying

Slice the block of tempeh long-way into strips about 1/4" thick.  You will get approximately 10 strips.  Combine the remaining ingredients except the oil in a large, shallow dish.  Place the tempeh in the dish with the marinade, and spoon some of the marinade over the top of the tempeh.  Marinate overnight if possible, or for the very least an hour, turning at least once.

Heat the oil in a large non-stick or cast-iron skillet over medium heat.  Add half the tempeh, being sure not to crowd the pan too much.  Cook for about 2 minutes or until browned on one side.  Flip, and add 1/2 of the marinade on top of the tempeh.  Continue to cook for another 2 minutes or until the other side is browned and most of the liquid is absorbed.  Drain on paper towels and repeat with the remainder of the oil, tempeh, and marinade.

Optional: for crispier tempeh, place the cooked tempeh on a lightly greased baking sheet and broil 3-5 minutes until crisp, checking often to avoid burning.

Enjoy!

Tips and Tricks:

1. The tempeh strips are rather delicate until they crisp up, especially if they've been soaking in the marinade for a long time, so be careful flipping them and moving them around in the pan.  If they break a little though, don't sweat it.  They will still be delicious even in smaller pieces.

2. The broiling step isn't necessary, but if you want a crisper texture, go for it.  The broiling still won't get these as crisp as "real" bacon, or even the store-bought veggie stuff, but it will give a chewier texture that might be better for sandwiches and recipes.


That's all for now; we are going to see Santa today, I'm on a last-minute shopping mission for a tea ball as part of a gift (I can't seem to find one anywhere), and the kids are going to help me with some cut-out sugar cookies at some point this weekend as well.  Holiday recipes for cornbread stuffing and easy chocolate dipped sugar cookies coming soon!

Love,

The Fur Ninja <3

Thursday, December 20, 2012

Vegan Holiday: Ninja Skillet Cornbread

Oh dear; it's almost Christmas and I have so many holiday-worthy recipes to post!  We are very busy here in the Fur Ninja house - almost have all of our shopping done and presents wrapped, tree decorated and lots of homemade Christmas decorations up around the place.  I'm hopefully starting the cookie baking today.  Here is a recipe that I made as part of a cornbread stuffing recipe (that one soon to follow) but is also a delicious addition to your holiday table as-is.  I don't like to toot my own horn, but this is THE BEST cornbread I have ever eaten, vegan or otherwise.  You will need a cast-iron skillet in order to make this recipe turn out perfectly, and if you don't have one I recommend that you purchase one.  Cast iron is simply the best, not just for cornbread, but also for making other fried things nice and crispy without anything burning or sticking.  I got my cast iron skillet for about 10 bucks from Target, so they are very affordable too.  If you don't have a cast iron skillet, you can make this in a 9x9 square pan by mixing the melted butter in with the wet ingredients, and then putting the fully mixed batter into the pan and baking as directed.  However, the cast iron skillet gives a wonderful, browned crust to the outside of the cornbread while keeping the inside nice and moist.  This not-too-sweet and easy to make bread is perfect for any holiday or just an every day meal.

Ninja Skillet Cornbread


Ingredients:

1 cup cornmeal
1 cup all-purpose flour
1/3 cup sugar
1/2 teaspoon baking soda
1/2 teaspoon salt
1 cup non-dairy milk
2 teaspoons white vinegar
1/4 cup unsweetened applesauce 1/2 cup non-dairy butter


Pre-heat oven to 375 degrees F.
Mix the cornmeal, flour, sugar, baking soda, and salt together in a large bowl.  Combine the non-dairy milk and vinegar in a measuring cup or small bowl and allow to sit for a minute to curdle.  Mix together the curdled non-dairy milk and applesauce in a small bowl.  Add wet ingredients into dry ingredients and mix until just combined.  A few lumps are okay.
Melt the non-dairy butter in a 10 inch cast iron skillet over low heat.  Once the butter is melted, turn off the heat and pour the batter into the hot butter.  Use a spatula or wooden spoon to gently scrape at the batter until it is mostly incorporated with the melted butter.  A little bit of melted butter on top or around the sides is okay.
Place the whole skillet in the pre-heated oven and bake for 30 minutes or until lightly browned on the edges.  A toothpick inserted in the middle should come out clean.

Serve this cornbread right away while it's still warm, or use it in my cornbread stuffing recipe (coming soon!)  I hope you love it as much as we did.  I will definitely be making more of this for our Christmas dinner!

More recipes very soon; until then, enjoy your holiday preparations and be sure to take some time out amid all the hustle and bustle for good food and those you love.

Love,

The Fur Ninja <3

Monday, December 3, 2012

A Not-Really Recipe: Broke as a Joke Hash

At the urging of one of my friends, I've decided to start posting some of my "in-between" meals.  You know, what the Fur Ninja makes in her kitchen when she doesn't have time/money to be cooking up a big meal from scratch.  Even ninjas need to cut corners sometimes, and I for one, think that's okay.  It's reality.  Hopefully me starting to post some shortcut meals doesn't make any of you think less of me!

I'll be calling these little in-between meals "Not-Really Recipes" and I hope you find them helpful and informative for those times when you need to cut some corners but still have a yummy and nutritious meal.  So here's my first: Broke as a Joke Hash.

Now, people who never have been broke (much less broke as a joke) might not know the ins and outs of hash.  The specifics of what's in your hash probably differs based on what country/region you're from, but basically a hash is a bunch of coarsely chopped food all mixed together, usually meat, potatoes, and some vegetables.  You can learn more about the "official" definition of hash here.  But here in the Fur Ninja house, hash is made when your fridge looks like this:

The hot dogs, butter, and mayo are Mike's :)

and you're still several days away from being financially able to buy food.  So you take a bunch of stuff from the fridge, a bunch of other stuff from your pantry, fry it all up in a  pot, and eat off of the leftovers for a few days, hoping it will carry you through until pay day.

There are three crucial elements to a successful hash: a starch, a protein, and a sauce. 

Starches can include rice, potatoes, pasta, couscous, polenta, stuffing, or anything similar.  Obviously, whole-grain "brown" starches are going to be far more nutritious than refined "white" starches, but since you're probably broke when making this, just go with what you have in the pantry.  You can even serve a hash over prepared instant mashed potatoes or biscuits if that's all you have at the moment. 

Protein - since we're talking vegan here - is not going to be meat.  You're most economical source of protein is probably going to be dried beans, prepared according to package directions, but you can also use canned beans, lentils, tofu (cubed, coated in flour, and fried until crispy is usually the best texture for hash), tempeh, seitan (it's rather inexpensive if you make it from scratch with wheat gluten, water, and spices), or you can even use some chopped "fake meat" (veggie burgers/dogs/lunchmeat/etc.) if you have them (I usually don't because I don't buy processed fake meats as a rule) or toss some nuts or seeds in.  Just make sure you have some sort of protein in there to fill you up.  The point of hash is to keep you full until you can do a grocery run, so if you're just eating empty carbs, it's not going to get the job done.

Sauce - pretty much anything can be made into a sauce, but here are some ideas: canned tomatoes/pasta sauce, veggie broth (thickened with a flour roux or cornstarch), peanut butter, tahini, refried beans, prepared sauce or spice packets (usually in Tex-Mex or Asian flavors - I love these due to the variety and cheapness but be careful of animal derived ingredients and MSG; a great place to get these is Asian markets), or even just a little bit of water/non-dairy milk and lots of spices if you don't have anything else.

The fourth good (but non-essential if you don't have any) addition to hash is vegetables - preferably fresh but frozen or canned is good too if it's all you've got.  You can put pretty much any veggie in hash, but especially good ones are tomatoes, onions, and mushrooms because they add a lot of flavor.

When making hash, just basically do a fridge/cabinet clean-out.  Heat some oil in a large pot, fry things like tofu, seitan, tempeh, garlic, onions, and fresh veggies first.  Then add your sauce and anything that doesn't need the fry in the oil (like beans).  You can either mix in your starch with the sauce (I do this with things like rice or pasta) or keep the starch separate and serve the mixture over it.  Keep tasting your concoction and add lots of spices, salt, and pepper until it tastes good.  Don't be afraid to experiment!  Just because you're hurting for money doesn't mean cooking can't still be fun :)

So by now you know that hash is different every time, but here's the ingredients/instructions for the hash I made last night for dinner.  Mike thought it was delicious, and I have to admit that it did turn out pretty well.  I have not included pictures because while hash can be delicious, it is almost never visually attractive.  All measurements are approximate.

December 2, 2012 Broke as a Joke Hash

Ingredients:

2 Tablespoons olive oil
3 cloves garlic, minced
1/2 of a large onion, diced
1 cup sliced mushrooms
1 large tomato, diced
1 1/2 teaspoons cumin
1 teaspoon oregano
1-14 ounce can diced tomatoes, undrained
1-14 ounce can large black olives, sliced
1-14 ounce can corn, drained
1-10 ounce can diced tomatoes with chiles, undrained (either mild or hot; I used hot)
2 cups cooked rice (white or brown; I used brown)
1 1/2 cups cooked beans or one can beans (any kind; I used white beans)
Half of a 14 ounce can of vegetarian refried beans
2/3 cup nutritional yeast
1 1/2 teaspoons salt
freshly ground black pepper
crushed tortilla chips

Heat the oil in a large pot over medium heat.  Add the garlic and onion, and cook 2-3 minutes until the onions soften.  Add the mushrooms and cook for 5 minutes until they are tender and starting to brown.  Add the tomato, cumin, and oregano, and cook for 1 minute.  Add the diced tomatoes, olives, corn, tomatoes with chiles, rice, and beans, and stir until everything is well-combined.  Add the refried beans, nutritional yeast, salt, and pepper and continue to stir gently until everything is heated through and the refried beans liquefy to form a creamy sauce.  If things look dry, add water one tablespoon at a time until the desired consistency is achieved.  Taste for spices and add additional if needed.  Serve with crushed tortilla chips on top.

That's it!

So hopefully that big ol' pot of food will hold us for a while.  All we've got left after that's gone is an Indonesian soup spice packet from the Asian market to add to some more beans, rice, and half an eggplant.  Hoping that some money comes through (I'm transitioning from disability to unemployment so my payments are sporadic and Mike is waiting for some partial unemployment due to missing work after Hurricane Sandy) soon!  Until then, we have love and lots of hash to keep us satisfied.  Hoping that you have full hearts and bellies as well.  More proper holiday recipes once I can afford a grocery run!

Love,

The Fur Ninja <3

Thursday, November 29, 2012

Vegan Holiday: Cheezy Potato Casserole

Hello again!  Goodness; I certainly have been prolific with the recipes this week, haven't I?  I'm so glad that I've had lots of good things coming out of my kitchen that I can share with all of you for the Christmas season.  We're definitely getting into the spirit here at the Fur Ninja house - watched Charlie Brown's Christmas special last night and this time of year always gives me the cooking bug even worse than usual!

This recipe is another side dish that would be a great addition to your holiday table.  After making it, I couldn't decide what to call it - vegan potatoes au gratin or vegan scalloped potatoes?  What is the difference anyway???  So I actually Googled "what is the difference between potatoes au gratin and scalloped potatoes?"  And here is what I learned: the difference is cheese.  Potatoes au gratin apparently always have cheese, while scalloped potatoes never have cheese.  I suppose you really do learn something new every day!  This still left me with a conundrum, because while these don't have any cheese, they are meant to simulate a cheesy taste with the addition of the nutritional yeast.  So rather than have a semantics argument with myself, I just called this a "cheezy" potato casserole and left it at that.  But no matter what you call them, these creamy and delicious potatoes are sure to please both vegans and omnis alike at your holiday table.  Mike gave these his enthusiastic omnivore approval; these will definitely become a favorite at our house!

Cheezy Potato Casserole
Prep time: 1 hour 15 minutes
Makes 12 servings 


Ingredients:

2 lb potatoes (russet or yukon gold)
4 Tablespoons non-dairy butter
2 Tablespoons flour
3 cloves garlic, minced
1/2 teaspoon onion powder
1/2 teaspoon thyme
1/4 teaspoon turmeric
1.5 cups non-dairy milk
2 Tablespoons tahini
1/2 cup nutritional yeast
1/2 cup tofu, pureed
1 Tablespoon miso
1/2 cup + 2 Tablespoons vegetable broth or water, divided
2 teaspoons lemon juice
1 teaspoon salt
freshly ground black pepper to taste

1 cup breadcrumbs
2 Tablespoons nutritional yeast
pinch thyme
cooking spray or olive oil

Preheat oven to 400 degrees F.
Scrub the potatoes well since you will be leaving the skins on.  Slice the potatoes into slices between 1/4 and 1/2" wide.  Then stack the slices and slice crosswise into quarters, like this:


Place your sliced potatoes in a 9x13" baking pan or casserole dish.
In a saucepan over medium-low heat, melt the non-dairy butter.  Add the flour and whisk constantly for 2-3 minutes until the mixture is a light golden color.  Add the garlic, onion powder, 1/2 teaspoon thyme, and turmeric and cook another minute.  Whisk in the non-dairy milk, tahini, and 1/2 cup nutritional yeast and increase the heat to medium.  Cook, whisking constantly until bubbly, 2-3 minutes.  Remove from heat.
Puree the tofu with the miso and 2 Tablespoons broth or water in a blender or food processor until very smooth.  Add to the saucepan with the 1/2 cup water or broth, lemon juice, salt, and pepper and whisk until well combined.  The mixture should be thick and creamy but pourable.
Pour the mixture over the potatoes and toss until everything is well coated.
In a small bowl, mix the breadcrumbs, 2 Tablespoons nutritional yeast, and pinch thyme until well combined.  Sprinkle the breadcrumbs evenly over the potatoes. 
Cover the potatoes with aluminum foil and bake for 30 minutes.  Remove the foil and spray the breadcrumbs with cooking spray or drizzle with a small amount of olive oil.  Bake for another 20 minutes.  Allow to cool for 5 minutes before serving.

Tips and Tricks:

1. Leave the skin on your potatoes.  It's easier and makes the dish more nutritious.  I almost never peel vegetables for recipes unless it is absolutely necessary.  Why do all that work if you don't have to?  However, if you really must, you can peel your potatoes before you slice them.

2. Measuring tofu - I know I have a few recipes that calls for measured amounts of pureed tofu.  Measuring tofu is kind of a pain and not a totally exact science.  I do it by breaking some tofu off the block and smooshing it into a measuring cup.  It's not 100% exact, but if you smoosh it in there enough (get that smooshing technique down!), it's close enough that you don't need to worry about it.  Use the leftover tofu from a partial block in a stir fry or puree it with tomato pasta sauce to make it creamy and full of protein :)

3. The cheezy sauce used on these potatoes would also be great poured over veggies or pasta.  You can also modify this dish by adding other herbs such as rosemary, parsley, and sage, or tossing in things like broccoli or other veggies, diced seitan, veggie bacon, etc. to make it a main dish rather than a side.  Get creative!


Hope you all love this dish as much as Mike and I did.  I definitely think I'll be making it again in the future with some chopped veggies and high protein add-ins like beans or tempeh.  It's really versatile and easy to make.  I definitely encourage you to try it, and feel free to leave feedback in the comments section!

More recipes to come soon.  I'm getting the cooking bug (specifically baking - started thinking about Chambord-spiked chocolate raspberry cookies last night!) pretty badly, what with Christmas and all.  I'm planning on decorating this place up like Santa's workshop and cooking until Mike and I are both fatfatfat (but happy!)   At the urging of a good friend of mine, I'm also planning on posting some "quick meal" ideas - basically what we eat in Fur Ninja land when I'm not up to cooking from scratch and just need something fast and easy, so be on the lookout for that too.  Until next time!

Love,

The Fur Ninja <3